


Home
Products
Download
Tutorials
- Hires
Introduction
Generate the model
Connect mesh part by a modeler
Correct morph target
Web Ring/Links
Contact
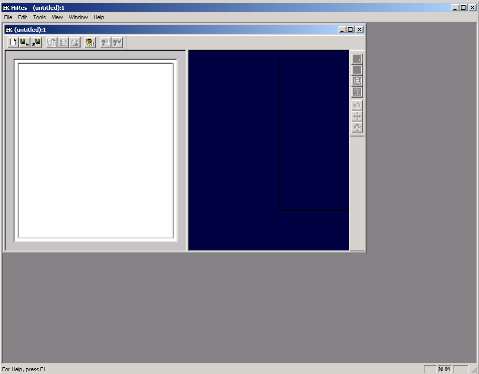 |
The image on the right appears when Hires starts. The main window contains the menu bar and a child window to manipulate the mesh. This one is divide in four parts. At the top reside the tools bar, few shortcuts to access program’s options and functions. The tools bar on the right side another tools bar modifies the rendering way of the object and allows to scale and rotate the object. The center's child window is divides in to parts. The white one will shows the UV template and the blue one will show the object in 3D way.
To modify the 3D view you can use 4 buttons.
|
| Left Button | Rotate the object. | Move the object. | View reset. |
| Middle Button | Rotate the object on the Z-axis. | Scale the object. | View reset. |
You can load the object by clicking on the second icon ![]() in the to
in the to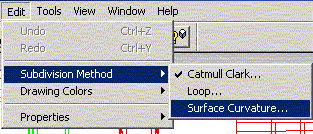 ol bar, from the import option in the file menu o
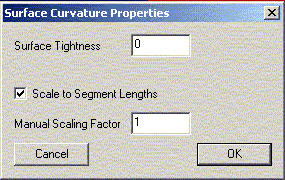 r the quickest way the CTRL-I sequence. When the object is load, goes to the Subdivision Method from the edit menu. There are three subdivision methods. The Catmull-Clark method is the nearest as Blender Sub-Surf except that you cannot choose the number of iteration and several may required. The Loop method divides only mesh that contains only triangles. Finally the most interesting one, the Surface Curvature method. This one, divides a model keeping mostly or exactly the mesh’s size. All other methods generate high-resolution polygon with a lesser size. The Surface Curvature allows Hires to be used at the end of the mesh development. Because this feature is only available in hires this operation that cannot be realize in the modeler program. After choose the Surface Curvature method a dialog box comes to set the option that will use during the subdivision process. For the first time, select the Surface Tightness value to 1, that will subdivide only the polygons.
Subdivide the model can be done by clicking the Calc now button ![]() in the tool bar, from the "Subdivide Now!" option in the tools menu or the quickest by pressing ctrl-g.
in the tool bar, from the "Subdivide Now!" option in the tools menu or the quickest by pressing ctrl-g.
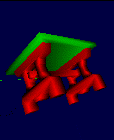
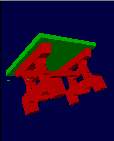
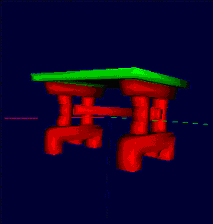
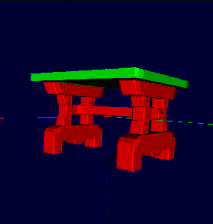
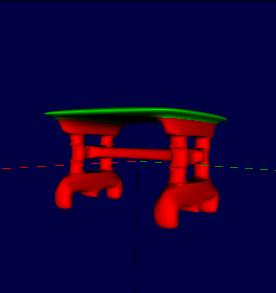
Do you remember the first image of this tutorial? To get the result obtains in Blender, the table must be divide 4 tiles with the Catmull-Clark Method.
| First Sub-division #Vertices : 336 #Faces : 385 #Textures : 757 |
Second Sub-division #Vertices : 1453 #Faces : 1455 #Textures : 2597 |
Third Sub-division #Vertices : 5827 #Faces : 5820 #Textures : 9872 |
Fourth Sub-division #Vertices : 23305 #Faces : 23280 #Textures : 38972 |
 |
 |
 |
 |
Just by pushing ctrl-g, the table’s quality increases significantly. Unfortunately, a fifth subdivision will create a model with 372613 vertices, 372480 faces and the 620972 texture vectors. So it is important to choose a compromise between the number object’s elements and its appearance. In this case a table generated by third subdivision will be fine. Load once again the model, divides it 3 time or use the undo feature to get the model divide 3 time. After, the model can be save by clicking on the save button ![]() , choosing the export option in the file menu or with the sortcut ctrl-e. Validate the default option and choose a file name.
, choosing the export option in the file menu or with the sortcut ctrl-e. Validate the default option and choose a file name.
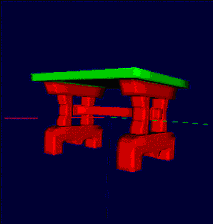
Do the same thing with the Catmull-Clark method. You will get the object like the image on the right. Save the model under another name.
|