


Home
Products
Download
Tutorials
- Blender Section
Introduction
Light the headlight.
Animation.
Other lights.
Web Ring/Links
Contact
This tutorial explains how setup realistic headlight. The reader must know how to use Blender, create and modify mesh, apply material, create light and use layers.
|
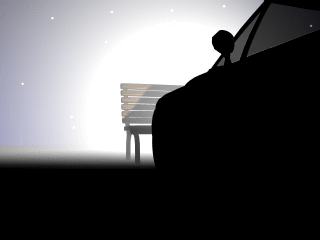
In this way, A rendering take from the rear of the car works fine. Remark, in this tutorial a spot halo is use, to show the light. |
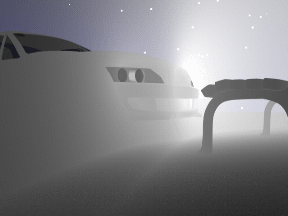 A rendering take from of the car's front
shows that the method explains
above cannot create realistic light. Because, even if the headlights
generate
light, they seem off. A rendering take from of the car's front
shows that the method explains
above cannot create realistic light. Because, even if the headlights
generate
light, they seem off. |
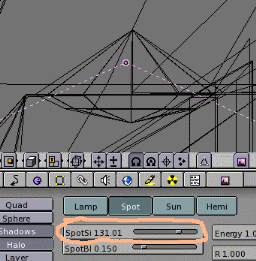
 Intuitively, the artist put a
spot inside the car's headlight to
simulate
its light creation. If necessary, the spot beam's angle (SpotSi) may be
modified to be the closer possible as the headlight.
Intuitively, the artist put a
spot inside the car's headlight to
simulate
its light creation. If necessary, the spot beam's angle (SpotSi) may be
modified to be the closer possible as the headlight. Blender shows a lighted object only when it reflects light. Because, the spot is inside the headlight and the camera outside, the light reflection on the headlight goes inside it, on the opposite direction of the camera.
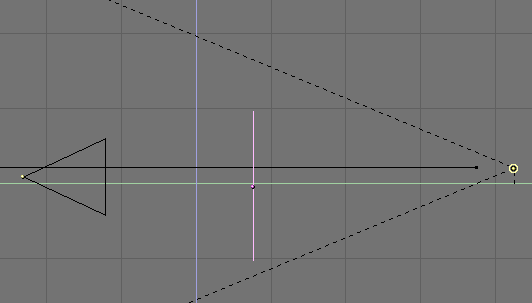
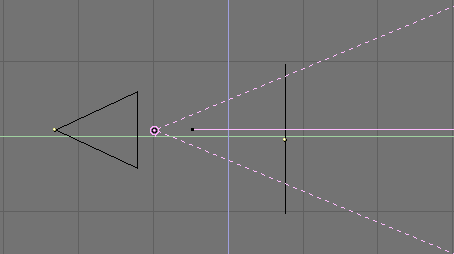
A little test with a square wearing a transparent material, a camera
and a spot shows that quickly.
The three elements must be located on the same axis, to create
two renderings.
The first will show the square illuminate from the rear.
The second will show the square light from the front.
When the two images are compare, The spot's light do not
appears on
the first.
The square can only seen, because a world have been use and illuminate
smoothly the scene.
| Light from the rear | Light from the front |
 |
 |
 |
 |
|